If you’re reading this, you are thinking about or are doing the Spine or one of the shorter versions of it. If that’s the case, well done! It’s scary isn’t it! Well done for putting yourself out of your comfort zone, and giving yourself a challenge that (at the moment) you really are not sure about.
I’m writing this as a person on the other side of race, who felt pretty bloody terrified in the weeks and months before doing the full Spine in January 2022…but pretty pleased to finish it in 143 hours. I normally write a long and detailed about my races, to replace my poor memory in a few years rather than to gain popular appeal, and this can be found HERE. (If you’ve already read it, then double congratulations…clearly endurance is a strength of yours).
So, I am writing this to put onto paper the training and kit that worked for me. I am absolutely no expert in this (or anything) but I reckon I’ve read every blog, Facebook post, and website about Spine-related stuff, so I’ve got a bit of insight. But I’m no expert, and everything you read here is my own opinion – feel free to disagree with it and tell me I’m wrong, you may well be correct. It doesn’t matter because this is the internet and pretty much anything can be quoted as gospel if you want.
Very very quickly. What do you need to know about my running experience…?
- Started running in 2008, for London Marathon.
- PB Marathon 3 hr 32 (in 2012).
- Ironman triathlon in 2012 & 13 in about 13 hours.
- 2014 – Grand Union Canal Race in 32 hours & Centurion Autumn 100
- 2015 – Thames Path 100, dnf Thames Ring 250 (at mile 170, for fucks sake).
- 2016 – Thames Path again (100 mile PB 22 hrs), Lakeland 50 in 12 hours
- 2017 – Arc of Attrition (in 32 hours), Thames ring 250 (in 80 hours)
- 2018 – Spine Challenger (43 hours), Escape from Meriden (chained)
- 2019 – Monarchs Way (615 miles in about 12 days), Escape from Meriden (chained)
- 2020 – Covid hit, hamstring injury.
- 2021 – Viking 100 (24 hours, walking only)
- 2022 – Winter Spine (143 hours)
- 2023 – Retirement from ultras, become fat and lazy and boring.
Although I loved running, most of the above ultras were hiked after perhaps mile 50, due to my entirely crap running prowess. A torn hamstring in late 2019 stopped me running completely.
There, that was quick wasn’t it!
Before I write anything about training, I need to write about luck. Luck is important. In something like the Spine, luck is really important. I was really lucky in January 2022. The weather, after the first couple of days, was cold but with little rain or snow. The ground was saturated with water, but I didn’t slip and pull a muscle or twist my ankle. My electronic kit (GPS etc) all behaved itself. My feet, although poorly, just about held together to the end. Overall, I was blessed with problems that I could deal with rather than any show stoppers that would prevent me from completing. I call this luck. Now don’t get me wrong – I was well prepared, well trained, and I had backups or contingency for things going wrong – but nothing can prevent a twisted ankle from becoming a show-stopping issue once it’s happened.
It’s because of this that a lot of racers in the Spine are well-trained, have great kit, but still don’t finish. That’s the lottery of attempting a race with so many factors outside your control. I would politely suggest that running a spring marathon, if you get to the start line uninjured, is a fairly safe bet to finish. Unfortunately the Spine works by a different set of rules. Some people will finish first time (like me) and some, equally deserving, will not.
Once you get to the start line, the lottery starts. And keeps running until either you finish, or your luck runs out. The point of what you are about to read is to give yourself the maximum possible chance of not needing to rely on luck because (for example) you are so practised at travelling on muddy hilly terrain with a heavy pack that you are practically like a hairy mountain goat and will stay on your feet no matter what (or if you do slip, your sinewy legs will accommodate a bit of awkward stretching in an odd direction).
Luck? Yep, you get the idea.
Someone famous said “The more I practise, the luckier I get” and I suppose that is my understanding too. Part of my (real life) job is to implement change and new things in my workplace, and so I spend a great deal of time imagining what could go wrong (when the new thing or change is in place) and how to either avoid that or deal with it when everything is crashing down. I apply a similar logic to my races…what could go wrong with my GPS device and how can I deal with it? So I make sure I’m really comfortable with the device (a little Garmin Etrex 30) and can handle the multiple menus and maps, but if all else fails I carry a spare device, setup in exactly the same way, so if my GPS fails in the middle of nowhere, I can carry on. If my spare fails, I have got enough skill at map reading to get out of trouble, although I’ve never needed to. In this way I’m allowing myself to get out of trouble if necessary. You got to give yourself the opportunity to be lucky sometimes.
Anyway, you get the idea…enough about luck.
Let’s talk about training. I’m guessing you are a runner at the moment, and have somehow ended up doing ultras, and then have somehow ended up at the Spine. Have you been dot-watching for a few years, thinking “I couldn’t do that”…? Yup, me too.
If you’ve come from a different background, that’s OK too. You don’t need any special talents to suffer. Just a stubborn mindset.
Running is great. Running gets your heart rate high and keeps it there. It’s a brilliant cardio workout, and if you are running a marathon, then you naturally need to run a lot. Unfortunately, if you are going be doing the Spine, or the Challenger or Sprint, it’s less likely you will be running too much. If you plan to run a lot, then you are too good to be reading this – you should go and email your coach instead (haha).
So if you are not going to be running much in the race, then your training shouldn’t consist of mostly running. It has to be hiking I’m afraid, which is not exciting or hard, but actually time consuming and slow. You cannot hike a cheeky 20 miler on a Sunday morning and be home for 9am when the family wakes up…instead you will leave the house at midnight, hike through the night, ideally in some shitty muddy hilly surroundings, getting rained on periodically, and then get home covered in mud and dog-tired at 9am…ready for a family day. You will stay awake all day (good sleep-deprivation training) and then attack a late roast dinner and some red wine (in my case) before falling into a coma about 7pm. Enjoyable? Yes, sort-of…..provided your family are understanding and you make damn sure you remain in a good mood throughout the day (you are choosing to put yourself through this, remember?).
Does that make sense? My best training was very like the paragraph above, as it replicate the worst parts of the race perfectly…overnight, mud, poor weather, lack of sleep…with no real chance at the end to go to comfy bed and recover properly.
You will need to find the perfect place to go and do this. It needs some serious elevation (unless you are willing to go up and down the same hill a few times) and it needs some rough terrain. Ideally it will be exposed so that on a stormy night you will get the full weather experience, and hopefully it will be in the middle of nowhere so there’s no danger of you bailing out early and getting a bus home. You will know if you’ve nailed it when you seriously do not want to go there for another absolutely crap training hike. But when you do go, the sense of achievement is significant…as is the relief that you do not have to go back for at least a week.
My own personal pit of doom is near Folkestone, about 45 minute drive from my house. I would leave the house at 10pm on Saturday, hike about 30 miles through the night, getting home about 8 or 9am. I think I probably did the 30 mile route most weekends through October and November, leaving December alone as I work in retail and I’m at work too much to train seriously. One of the most satisfying things about finishing the race is that I will never have to go back to Folkestone and go up and down the cliffs there again… I disliked it that much.
Needless to say, you won’t only do overnight hiking, that would be far too depressing (and too far from home!) I used to do another mid-week hike, across some local fields, for between 3 hours and 5 hours, with the focus on going as fast as possible on the better terrain. As fast as possible? Perhaps 16-17 minutes per mile or quicker if possible. I’d normally start quicker, than slow after the first hour, but it was rough version of a tempo run, pushing a bit. Generally I’d be aiming for 11 miles in 3 hours to 16 miles for the longer times.
Use these hikes to learn what you like to eat. Eat a lot of it.
OK, so that’s hiking covered…build up to 30 miles (once per week) and a shorter faster effort mid-week by October/November. I’d do this will full pack (maybe 8-9kgs) and wearing something close to the kit I’d wear on the race.
Other training? Yes, absolutely. If you are as bad at hills as I am, then get some practice in! I spent more time on the stepper machine at my local gym than was probably necessary, but it was an easy way to replace the running that I enjoyed. This was the equivalent of the cardio that meant I could keep my heart rate high for an hour, sweat pouring off me, while everyone else in the gym looking at me worryingly, hoping I wasn’t about to have a heart attack.
Weight-training? Probably a good idea, but I’m going to confess that I did not really bother. I found the effort of lifting a heavy weight (and then putting it down) was profoundly pointless. I suspect weight-lifters would tell me that running for an hour in a big loop to end up where I started was equally pointless (but I love it!)
And that’s the extent of my not-very-complicated training regime.
Or is it?
I gave up alcohol for about 3 months before the race. At least, I reduced my considerable consumption to just one day per week (Sunday red wine anyone?) which is supposed to be very good for you.
I started taking multivitamins and vitamin C for 4 months before the race, which made absolutely no noticeable difference at all. But I got no colds, flu or Covid during these months. (Remember what I said about giving yourself the opportunity to be lucky?)
Practice sleeping out in your bivvy & sleeping bag. Unpacking it, packing it away, dropping it in a muddle puddle, whatever you fancy. Practice. I really like and enjoy wild camping with a lightweight tent, but I will still bivvy as a training exercise to get an hours sleep and then pack up and carry on up the trail.
Hang on a minute. Let’s quickly touch on the idea of bivvying out during the Spine race for a minute, and please take some advice from me. You should be ready to do it if necessary but only the absolute last resort. That’s it. The likelihood of unpacking your gear, getting your muddy clothes off, managing to get into your sleeping bag and bivvy, and finally getting some decent sleep, and getting back on the trail in a reasonable amount of time is low to zero. Don’t get me wrong, you may need to do it, but personally I happily recommend a 10 minute nap on the trail (or ideally under cover) which will refresh you without eating up hours of time. Practice both a ‘proper’ sleep in your bivvy for a few hours, and also a nap that refreshes without needing to unpack everything.
So what do you use for a quick nap? I bought a very lightweight tarp, Pike Trail Pocket Blanket, and I would wrap myself up in this to keep the wet ground off me, and the wind/rain off. It may well be cold, so I would wrap up in a foil blanket before wrapping the tarp around me, it was surprisingly warm. The only time this didn’t work was when I was wet through to my clothes under my hard-shell, and predictably just lay there getting colder and colder. A rough way to learn that movement is the best way to keep warm if you are wet.
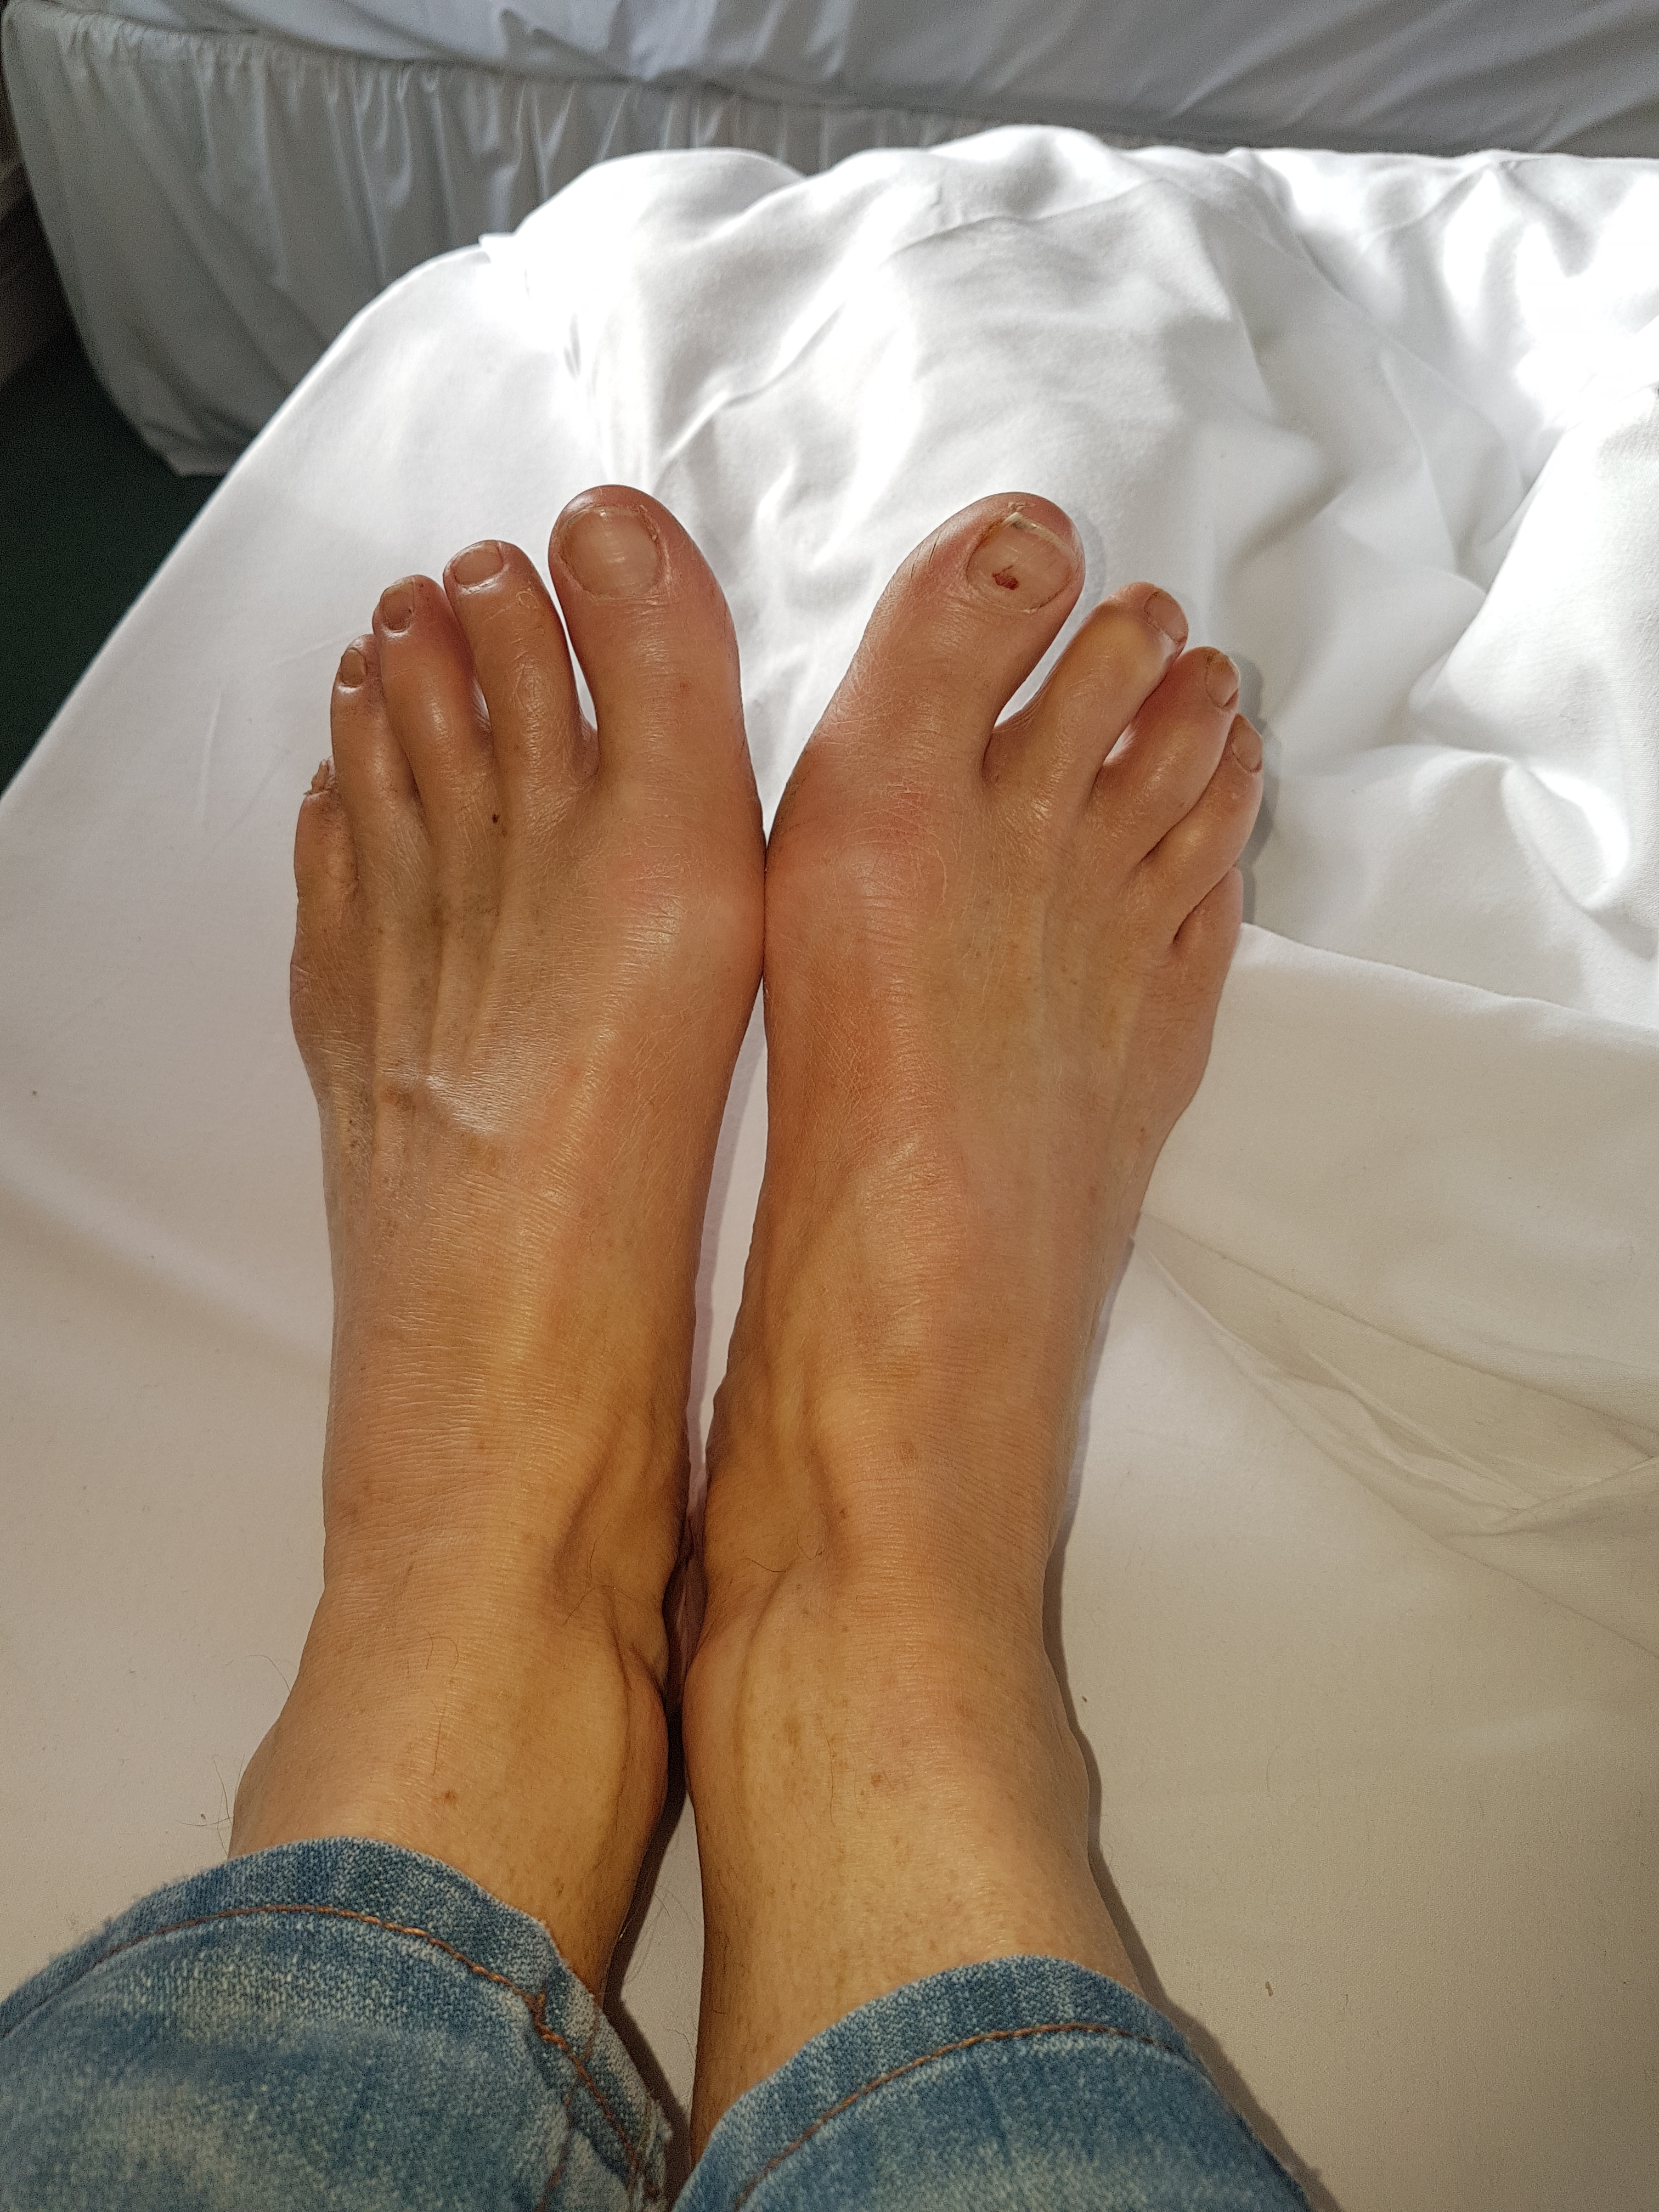
Foot care, or more specifically, foot taping. I bought the very excellent book, Fix Your Feet, and read it. I practised the likely taping I would need (balls of feet, heels, toes) to get ideas about what worked and what came unstuck. It’s quite an art! At the race itself, there are some brilliant medics that will put tape all over your feet if you ask, but it helps to be able to guide them with your experience. More importantly, if you need to stop on the trail and fix a hot-spot, there’s not a medic to help! I can tell you that the strip of KT tape I need to cover my little toes is exactly as long as my thumb, and exactly half the width of the tape…that’s how much I practised.
If you’ve never needed tape on your feet before, then it cannot hurt to practise anyway! I used to think my feet were bomb-proof, but the waterlogged conditions you will experience on the Spine will put most feet at risk of maceration and blisters.
OK, so you’ve spent a good few hours hiking, you’ve got all the kit you’ll ever need. You know what you like to eat on the trail and you can refresh yourself with an hours sleep under a hedge. What else do you need to do?
Train your brain.
Yes, seriously. Your brain needs to learn to suffer, and take it in good spirits. It needs to be able to be blown to buggery by the wind, and remind itself that at least it’s not as bad as storm Angus was on Folkestone cliffs. Your mind needs to reach exhaustion, and tell itself that your body has got hours of hiking left in it. It needs to reach maximum boredom and be sick to death of the slippery mud, and know exactly which song or playlist will lift it out of the gloom.
Unfortunately, the only way to reach these depths is to put your shoes on and get outside. You cannot do it from the sofa. The more you commit to training, the more you’ve got to lose by DNF’ing during the race itself….and you will want to quit at one point or another.
I think it was Sarah Fuller that made a very perceptive Facebook post a few years ago, that said (and I paraphrase) you needed to go into the race “knowing your ‘why’” so that when you wanted to drop out you could tell yourself why you were there in the first place. Have a think about that. And then train your brain.
Lastly, recce what sections of the route you can. I was able to do most of the route, solely because Covid delayed my race by a few years. Recce 1, 2, 3. That gave me time to juggle work, family life, and other commitments to zoom up north, hike a section between two aid stations, and then get back home as quickly as possible. I was helped in this by my son going to university up north, so I would drive him back for the start of term, and then recce more of the Pennine way for a few days before getting home again. Would I recommend any particular sections? Personally, the section from Middleton to Alston encompasses Cauldron Snout, High Cup Nick, Cross Fell, and Greg’s Hut. It’s just got everything, in my opinion. I found it the toughest section, the climb up to Cross Fell is genuinely the toughest climb I’ve done in any race. It’s a section that you want to try first in my opinion. Second, is the final section over the Cheviots, simply because it’s so remote. Recce with all your kit, make some mistakes, sleep badly in Hut 1, run out of water, take some pictures and fall in love with the Pennine Way.
Right, I think that’s enough about training. Let’s get to the meaty juicy bit you’ve been eagerly waiting for. Let’s talk about kit and see how easily we can blow a couple of grand…
Some of what you are about to read is just a duplicate of my kit list for 2018 Challenger, but this is what I used, discarded, retried and tested for Winter Spine 2022.
Shoes – I ended up using 2 pairs of Hokas boots in the end. A pair of Hoka Challengers for the first half, and Speedgoats for the second half. I’ve used Hokas for a while, but originally discarded the idea of using them for the spine as they would be too narrow with the multiple pairs of socks I intended to wear with them. I had a nightmare choosing other brands though, working through Innov8 Rocklites (really comfy, but simply not padded enough for long 24 hour sections) to La Sportiva Ultra Raptor II (nice, but not enough grip), to trying all the above with special expensive insoles. In the end I came back to Hokas and I figured I’d just have to cope with the slight narrow fit. I had the first pair one size larger than my usual shoes, and the second pair were two sizes larger. Even with some foot swelling, those Speedgoats were a pleasure to put on at Middleton.
I did have a spare pair of very big shoes in my drop bag in case of foot-swelling disasters. They were a whopping size 14 Innov8 Rocfly 390, that resembled boats rather than shoes. I’m thankful to say I didn’t need them, but having spent the last few days of the Monarchs Way in tight shoes, it’s just agony to walk for days in shoes that are too small and I won’t make that mistake again.
All the above shoes are boots, to give the ankle added stability and prevent anything getting into the shoe.
I experimented with gore-tex shoes & non-gore-tex, because there is a huge swell of opinion (I found) that said you wanted non-gore-tex shoes so the water could run out. Well, I walked through ankle high grass, soaking wet with dew, in non-gore-tex shoes, and my socks were soaking in minutes. Gore-tex shoes, in the same field, kept my feet dry. It was a simple choice for me…I hate having wet feet. So my shoes would be gore-tex, and I would find some quality waterproof socks to keep the inevitable water off.
Socks – I’ve been wearing this combination for a few years, and have found they work really well for me. I have a pair of Injinji toe liner socks next to my feet, and some quality merino wool hiking socks next to them. On top of them, waterproof socks. Now you can see why my shoes felt a bit tight!
Injinji are really expensive, but I find they last for years (I’ve been using some years-old pairs, from when I did GUCR in 2014), and they prevent any skin rubbing on skin, preventing blisters. The merino wool socks are simply there to absorb sweat that comes out of the Injinji, and also do the usual merino job of keeping my feet warm or cold as required.
There are two main brands of waterproof socks…Sealskinz and DexShell. I read that the first half of the route is the wettest, and that knee-length socks are essential to prevent water going over the top…so I wore knee length Sealskinz for the first half (at an eye-watering price of £50) and then calf length DexShell for the second half. I’ve worn a lot of waterproof socks over the years, and usually find them very reliable, but their performance deteriorates over time, so the ones I wore for the spine were packet-fresh and untouched…and predictably they did a great job. I even had to traverse a couple of deep streams in the Sealskinz and didn’t feel my feet get wet.
I only used the two pairs of waterproof socks, but I had spare Injinji/merino socks with me in my pack and enough pairs in my drop bag to ensure I could change them multiple times if the need arose.
A quick note here: no waterproof sock will keep your feet dry if you go through every puddle and stream available. I will do everything I can to keep my shoes dry, skipping around puddles and mud until it is absolutely unavoidable to get them wet. I don’t like running with wet feet, and the cold would have been serious if my feet had been wet for hours. If there is no danger of feet getting wet, then don’t use waterproof socks, as they are bleeding expensive and hold the sweat inside, basically poaching your feet over a long period of time.
Gaiters: when I’m out running I have a simple pair of dirty-girl gaiters that cover my ankle and prevent sticks and stones going into my shoes. For Challenger in 2018, I invested in a pair of Berghaus GTX gaiters. These are expensive, but are probably one of the most important bits of kit after jacket and shoes. The gaiters have a strong thick strap under the shoes that can be easily replaced when worn out as they are attached by Velcro (I’ve replaced mine 3 times). The gaiters go from the tops of your shoe (another good reason for using a boot) right up to your knee, and fasten with Velcro all the way down. They close nice and tightly around your lower leg, and provide superb protection against water and mud. I don’t think you can run in them, but I didn’t try to be fair. They were comfortable and secure; I didn’t have to adjust them at all once I fitted them correctly. I’ve used them for multiple hikes, recces and finally the Winter Spine in 2022. They are magic.
Underwear: just a simply pair of running shorts, with a nice worn liner inside that I’ve done multiple miles in. Whatever feels really comfy.
Trousers: I had a pair of cheap running tights under a brilliant pair of Montane Terra hiking trousers, which I’ve been using for years and I find they are very comfortable and dry amazingly quickly when they get wet. Over the top of all of these I wore my waterproof trousers from the very start.
Waterproof trousers: I used a pair of Berghaus Deluge trousers from the start (as it was raining/snowing), and wore them every single mile. Brilliant things, although they look a bit bedraggled now! They performed well in the heavy rain, and even better they have a long zip up each side so can be put on over shoes – the last thing I wanted out on the trail was to struggle to put trousers on over shoes. I’m not a massive fan of waterproof trousers, but these did a great job without overheating my legs. If you want to have a look at them, go to Go Outdoors, where they have racks of every different type of waterproof trousers in different sizes, and try loads on. It’s like internet shopping but with stuff to try on. I had second, cheap, pair in my drop bag in case of the inevitable hole that would appear, but didn’t need them.
Top base layers – I had 2 merino wool base layers in my drop bag, ready for the cold weather. Interestingly, I usually overheat on long runs and I found these worked well. They did fill with sweat if I didn’t vent them on big climbs, but did a great job of keeping me warm. I also had a pair of merino wool tights in case I started to get cold, but I never actually needed them.
Top layer – During Challenger in 2018 I used thick winter running tops, which worked well, but I was very conscious that when they got wet they would take hours to dry. For the full Spine I used light long sleeve summer tops, but multiple layers of them so able to change them out easily if wet. I learned this from doing the Monarchs Way in 2019, and the benefit of being able to keep cool by removing a layer is invaluable.
Mesh vest. Yes, it sounds strange, but these are amazingly warm and light. I used Plant X Carnac Mesh base layer and it was very comfy and warm. Unfortunately you look horrendous in it, but that can’t be helped can it?
Jacket – the most important piece of kit. For Challenger I spent hours literally deciding which to get, as I didn’t own a good enough jacket previously. I went for a hard-shell jacket, which was going to be bulletproof in poor weather, but was heavier and less breathable. Ifyou are going slow and steady like me, my recommendation is to go for the best you can afford, and I got a Mountain Equipment Rupal jacket. It was great for the Challenger, and was again absolutely amazing for the full Spine, and every other serious ultra I’ve done in between. It’s a magical jacket and easily my favourite bit of kit. It’s saved me more times than I care to think about, and I get a feeling of real invincibility when I wear it.
However, while researching for the full Spine, I was also reading about the mythical properties of Paramo jackets. The Altra 3 jacket specifically. Paramo jackets work very differently from hard-shell jackets. They don’t try to resist the rain, but rather absorb it and then use your movement to ‘squeeze’ the water out. They are a quality piece of kit, and are rightly raved about. I managed to get one, and decided to carry it with me as a warm jacket that could go underneath my Mountain Equipment jacket if it got too cold, or my hard-shell gave up the ghost and started letting water through.
Most people would feel that this is a bit of overkill (and they’d be right) but the risk of getting completely soaked from a suitably torrential bit of rain, or the risk of getting some proper hyperthermia from a particularly cold night out on the Cheviots is not a great prospect either. Please don’t underestimate the cold that you feel after days on your feet with minimal nutrition, at elevation, in January, in Scotland. It’s not funny.
The Paramo jacket was great, but I never got used to the idea of wearing a jacket in the rain that doesn’t repel the water. There’s a really good reason it is not allowed to be your main jacket on the Spine kit list!
Neck gaiter – We’ve all got loads of free buffs from previous races, and these are what I used for the Challenger. But take a tip from me…splash out on a merino wool buff. It stays dry (somehow) in the rain, it feels warm all the time. It was my favourite bit of kit, almost.
Hat – I took one very warm waterproof hat, that I got cheaply off the internet a few years ago, and worn through every cold ultra for years. I think it cost £2. My jacket hood kept the rain off when the rain started so it didn’t need to be particularly waterproof, just warm. During the day, or if it was too hot, I used a buff on my head instead. Get something that covers your ears.
Head torch – I usually use a Petzl myo, which I find does everything I want and had great battery life. For the Challenger I traded up to a Petzl Nao plus, which was horrifically expensive (really really expensive) but after a recce in November with the Myo, I wanted more light for the night sections (i.e. most of it). I found the Nao plus gave loads of light (750 lumens I think, for 16 hours) and I liked the reactive lighting (which meant it dimmed in well lit areas to save battery), but in truth I didn’t like the rechargeable battery which forced me to buy a spare rechargeable battery just in case required out on the trail, and was fiddly to change. The charge time is 6 hours too, which meant it wasn’t possible to fully recharge while at an aid station. You can control the torch through an app, which also tells you how much battery life you have left….but it’s a gimmick.
I also took the Myo with me as a spare, just in case, and spare batteries for both torches. The Nao plus worked superbly, and although it was overkill it did a great job.
I also carried a small hand-held torch that could be focussed to provide a very narrow strong beam in the dark. It’s a little known fact that in rain or mist, a head torch will diffuse the light throughout the moisture, and give hardly any visibility beyond about 2 metres. That’s when you get out your torch and shine a beam of strong light that actually shows you where to go. Much better.
Goggles – part of the mandatory kit, you’ll find pairs by Bolle are cheap, comfortable and do the job. Don’t spend ages searching around for an alternative, they’re all rubbish. Just get Bolle. And then practice with them wear them for hours, work out where they rub.
Gloves – this was really interesting. I had a few pairs, but the ones I used most were these from Amazon. Waterproof, thermal, brilliant.
Glove Pic
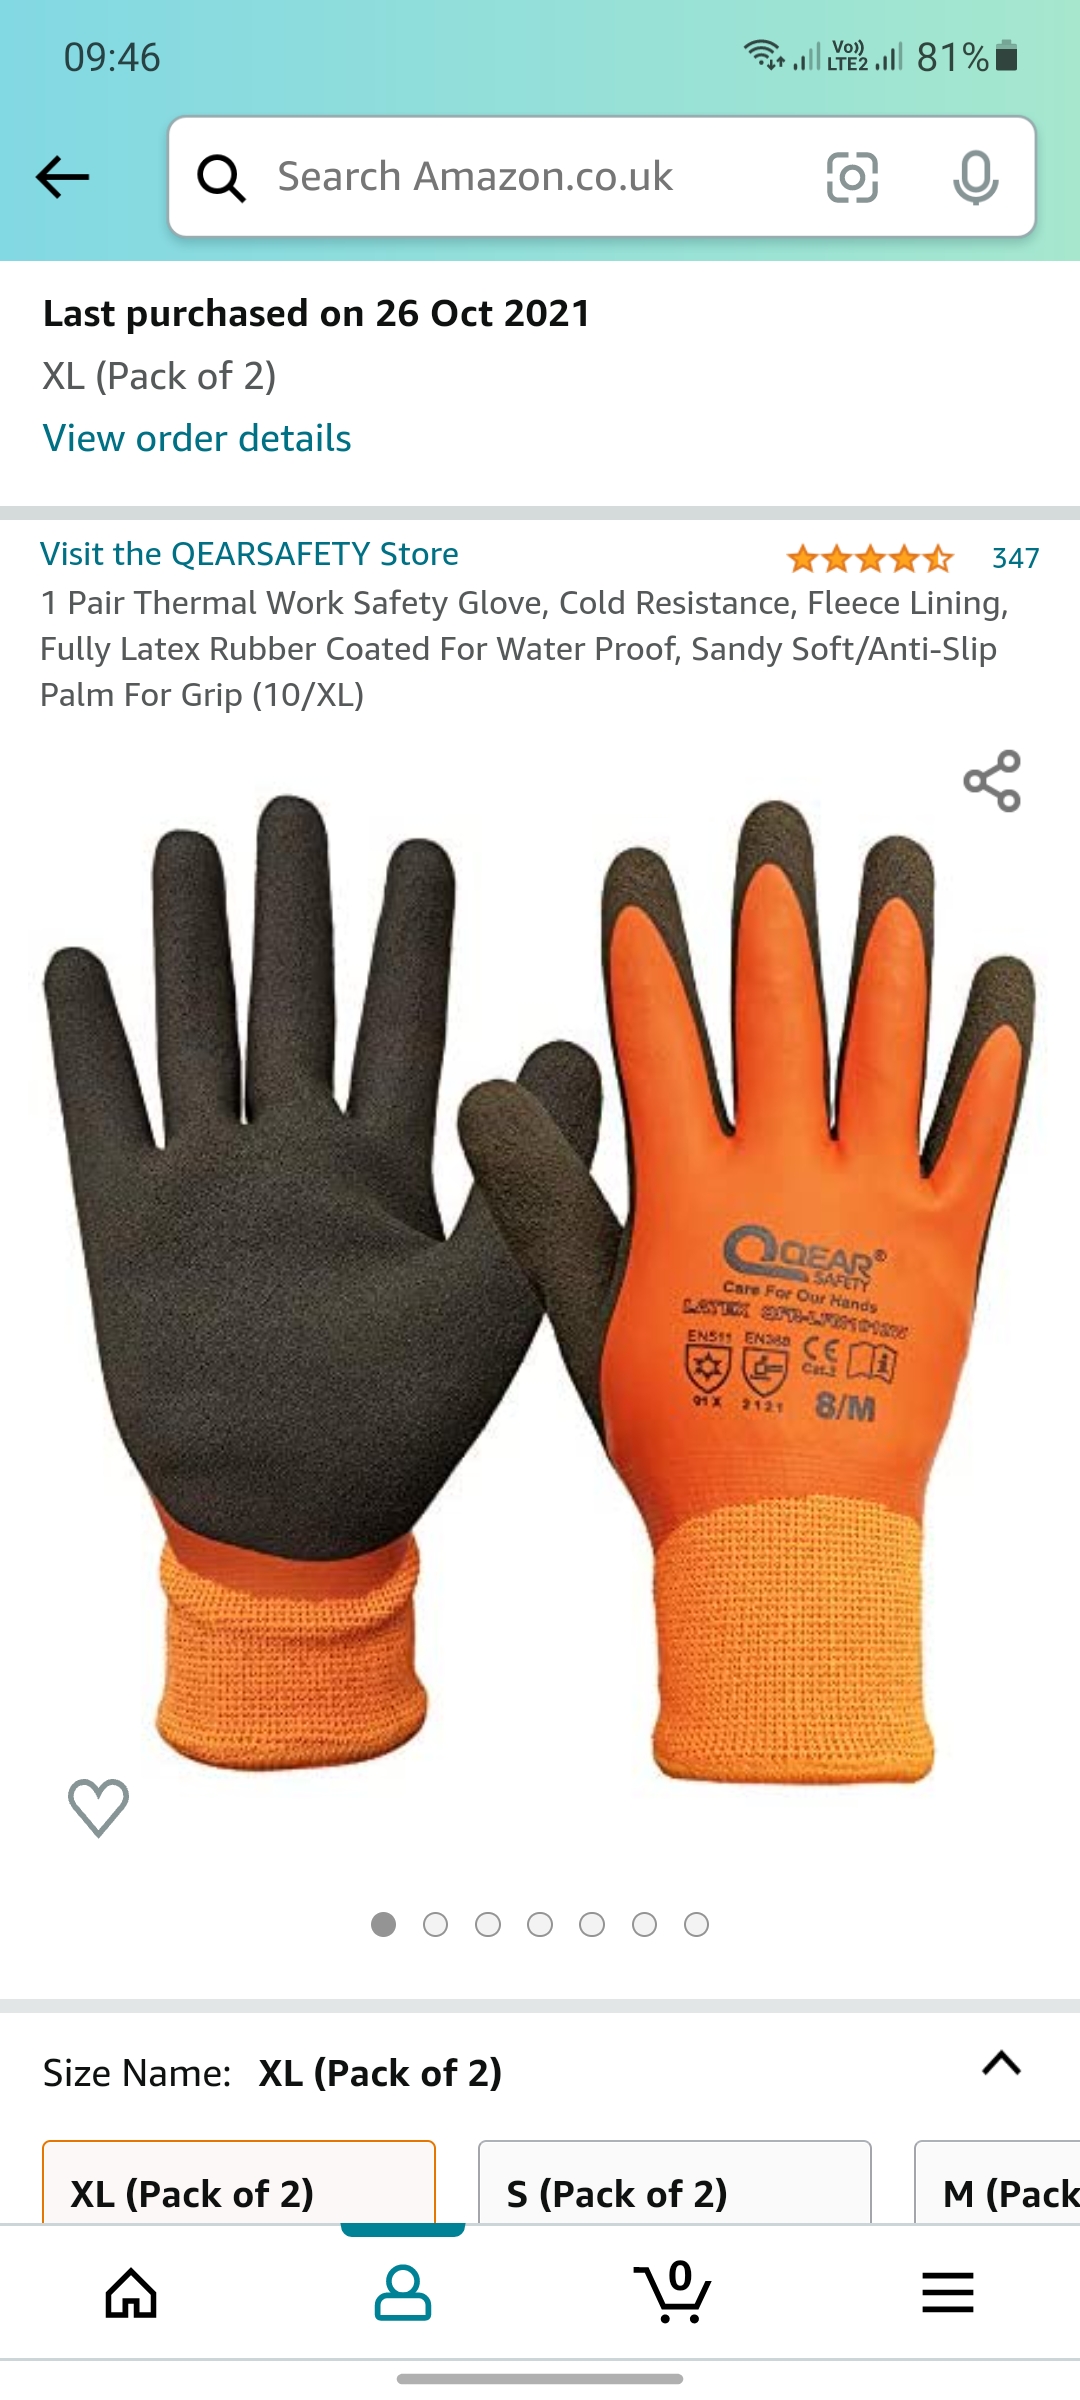
These kept my hands warm, dry, and although I couldn’t feel much through the thick membrane I did have some mobility. I really liked these, and wore them a lot. Dry and warm hands no matter how much it rained.
In addition, I got a pair of Gore-Tex Extremities Tuff Bag over-mitts which allowed me to move my fingers around more than the thermal gloves above. These were great, and very light to carry around. They got a bit sweaty inside after a while and gently disintegrated throughout the week, bless them.
I saw loads of other people with really expensive mitts, by Montane or others that just could not cope with days in the rain and simply became completely waterlogged. Don’t do this! Avoid wearing them in strong rain, unless you have something waterproof over the top! My version of these was a pair of Mountain Equipment mittens. They are Primaloft, so warm when wet, and would be my glove of choice in the real cold. When I did my recces, I was able to put hand warmers into the mittens which kept my hands toasty when I was getting cold.
Overall, I have learnt that if my feet, hands and neck/head are warm then the rest of my body generally follows. Hence socks / gloves / buff & hat are probably the things that I already knew what worked for me, and I didn’t have to look around too much.
I was really tempted to carry more layers, t-shirts or more long sleeved tops that I could put on if required, but I kept them in my drop bag and in the end didn’t require them. Something I saw when I volunteered at the 2021 spine was racers getting in to aid stations completely soaked through, and running out of dry clothes to change into. I made sure my drop bag contained enough clothes to change most layers at every aid station. Luckily, I didn’t need most of them as there wasn’t too much rain after the first couple of days.
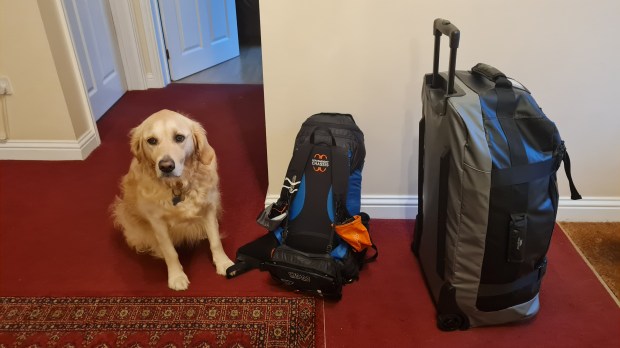
Rucksack – OMM classic 32ltr. Was bigger than I needed, and I had to be controlled so that I didn’t fill it with even more stuff, but I’ve used it a lot and it fits well. I especially like the various pockets it has on the waist belt and top. I used an OMM trio front pack, which was great, very big (4 litre) and hold everything I needed for easy access. I had a single water bottle fitted to one of the shoulder straps with an OMM pod which worked well, and on the other strap I had an OMM pod holding a flask of hot drink.
GPS unit – Garmin Etrex 30. I’ve had this for a few years, and it is simple to use but very good. If you don’t use one much at the moment, then get out and use it, especially if you aren’t very technological gifted. It is a bugger to get used to, but I can strongly recommend making your mistakes when you’re not in a race. Please don’t underestimate this, unless you are an expert map reader. I can read a map, but not after 40 hours with no sleep, and the GPS saved me more than once. As I mentioned earlier, I carried a spare GPS with me in case of emergencies which I’m thankful to say I did not need. It sounds expensive (and it is) but see if you can borrow one to use as a spare rather than buy one…I’m convinced most GPS units in the country spend 90% of their time in a drawer somewhere, not being used.
Sleeping bag & bivvy bag. Dead simple…Alpkit Pipedream 400 and Hunka XL bivvy. The sleeping bag is good down to -6 degrees, and I’ve slept outside in frosty weather in November with no problems. It weighs 800g, which is heavy, and is quite bulky, but it is such a reasonable price it seemed daft not to get one. The XL bivvy seems to be decent, but quite small (even though XL) for me – I’m 6ft.
Sleeping mat –Alpkit Numo. Just get the lightest. You’ll be so knackered it won’t matter if it’s comfortable. The only checkpoint that doesn’t have beds available is Bellingham, and by that stage sleeping on the floor (on an inflatable matt) is the least of your problems. I already had an Alpkit Airo 120, but chose the Numo as it was a whopping 100g lighter and much less bulky.
Stove – I used an MSR pocket rocket, and a titanium pot from Alpkit with windproof matches. I didn’t take a heavy wind blocker, but a couple of pieces of stiff silver foil (cut down bits of silver tray) that would work if I couldn’t find any shelter. I didn’t use them in the end, but practised until I could set them all up, boil 2 cups of water to make cup-a-soup, drink and pack up in just under 10 mins. Even in that short time I was getting really cold (practice when out hiking, not in your kitchen!), so it is vital to practise to be quick. I was tempted to go for a jet-boil or something similar, but I love the compactness of the kit I had.
Yaktrax pro – mandatory kit, didn’t use them. You need to practice putting them on! Get them cheap from the internet (mine cost £7.50, they are £20 in the shops)
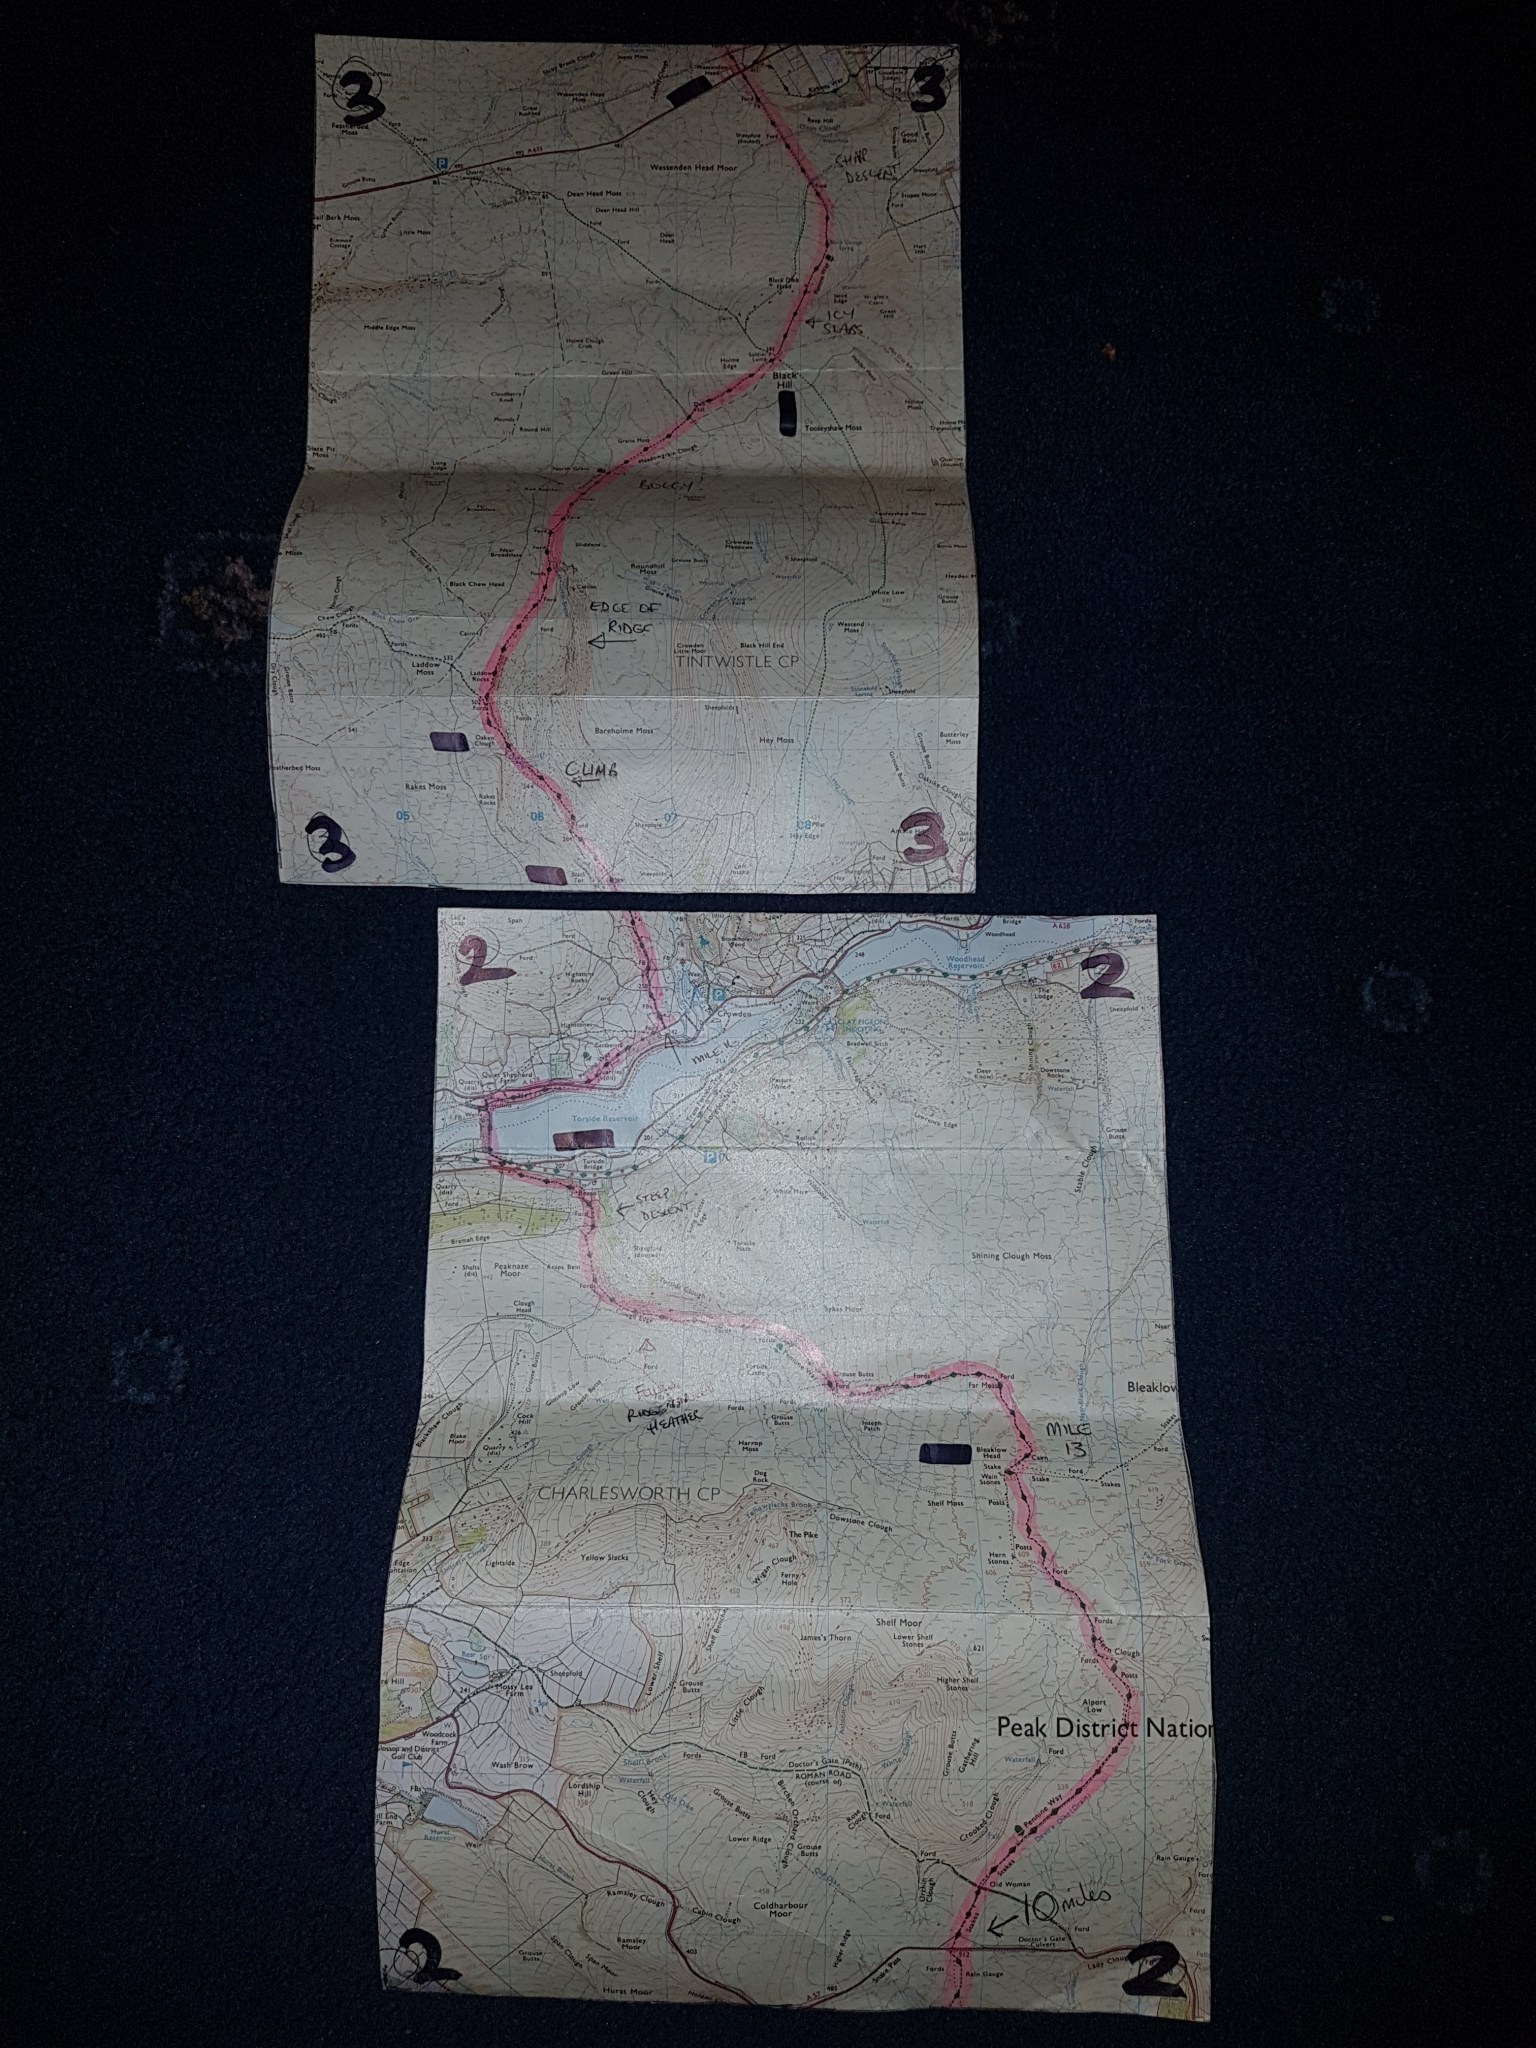
Maps: I used the OS A-Z for the Pennine way, which has a highlighted line over the Pennine way. Simple, easy. I used it a lot on my recces, but very little on the race itself. Make sure you have it in a waterproof cover or it will fall apart.
Rear red light: Loads of different versions available, I ended up using a Silva Simi Red Safety light. Light, bright, great. I had 3 with me in case they all died after one night, but in fact the first one I used was still going strong at the end.
And what else did I take?
Hand-warmers, from Tesco, one use only but stayed warm for 10 hours on my recces which was way beyond my expectations. Nice to have if you get proper cold!
Plastic poncho, to protect in case of poor weather. These take up no space, are very light, and made me feel confident about encountering some proper weather if my hard-shell started to leak.
Rubber gloves – plain old Tesco washing-up gloves, very light, which I kept on the outside of my pack and used when I took my disgustingly muddy boots and gaiters off. Purely psychological, but I hate to get my hands covered in bog when taking my shoes off.
Water bottles. If using one with a bite valve and straw from the bottle, do put a bit of insulation on them. I found that while my straw didn’t freeze up (it was wrapped in felt and duct tape), my bite valve would crack when I used it as the water inside would freeze. I learnt to blow the water out, back into the bottle, after every drink. Flask for hot drink on the other strap, mine had a screw lid, but I was envious of the people that had a flask with a flip-top so they only needed one hand to open it and take a drink.
Food – tough one this, as everyone is different. I took 2 freeze-dried meals in my rucksack, 1000kcal each, in case of emergency. In my front pack I had a small bag of ‘nibbles’, but after the first leg I found I wasn’t eating loads outside the checkpoints. My other recommendation (as with any long ultra) is never pass a pub or shop without buying something to eat, whether it is a massive lasagne or just a pack of sweets, the monotony of identical food is easy for 12 hours, but after a few days is an easy way to stop eating.
Spare shoelace. Just in case.
Spare batteries for GPS, headtorch etc.
First aid kit, as required, and the smallest sharpest penknife I could find that had a pair of scissors on it. Look on Amazon. Make sure you have foot tape included in here.
Phone, headphones…I often listen to music to keep my mood positive, and on the Monarchs Way I listened to the same artist for about 9 days straight, charging my phone as I went. I’d suggest carrying a charging block too, just in case. Charging phone or watch or head torch while on the go is a big part of these long ultras, and I always carry too much electronics ‘just in case’. Just imagine not being ableto leave a checkpoint because some bugger has unplugged your kit while you were sleeping. Put the electronics in a plastic bag, as they will undoubtedly get wet at some point.
Poles – can’t forget these! I’m quite a fan of poles up the ascents, and used them for multiple ultras like the Arc of Attrition, Monarchs Way and on the Spine Challenger. I know there are loads of sexy thin pair around, but I also read that a lot of the thin ones get broken on the spine as there are a lot of nooks and crannies for the tip to slip into and get snapped off when you keep moving forward. On one of my recces that was exactly what happened to me. So my pole of choice is…Amazon best seller “Pair of Trekrite Antishock Hiking Sticks / Walking Poles – Black”. These are chunky and strong, and even when I did snap the tip off one on my recce I still used it for days. They are telescopic, which means they are bulkier than folding poles, but they work fine. Best of all they are £20. They weigh 285g each, which is loads, but I think worth it (Black Diamond are £80 and only a little lighter). Personally, I’d rather spend my money on a better jacket or solid gaiter than poles, but that’s just me. I had a spare pair in my drop bag also, in case of disaster. And I think it’s common knowledge, but make sure you mark them with something unique to prevent another racer accidentally picking yours up at a checkpoint (I found bright pink duct tape scared away everyone else, or perhaps they just didn’t like the look of the cheapest poles out on the trail).
I should point out that if I was in an event that only used poles for a small amount of time, these would be a nightmare to carry with you until they were required, so I’d probably get something smaller….but for the Spine, perfect. Oh yes, almost forgot, put duck tape around the top third of the pole, as it’s much warmer on bare fingers than the metal pole when holding them horizontal. Also, the duct tape comes in handy when you tear your waterproofs on barbed wire as you can unpeel it from the pole and cover the rip.
I didn’t need to carry a poo kit, so can’t advise too much on that thankfully. In my day we just dug a hole with a stick and covered it up afterwards.
What else did I do? I had a couple of loops of elastic added to the waist belt of my pack so I could hang things on them that I didn’t want to carry. For example, all my gloves had a loop sewn into the wrist so I could take my gloves off to eat and not drop them. Overkill? Yes, possibly, but losing a glove on the trail in poor weather is not a great idea.
I marked the water level I needed on my aluminium pot for the dried meals I was carrying, so it was simple and easy to boil the correct amount of water.
I counted how many socks I would need in the absolute worst case weather, and had enough to change my socks at every checkpoint, and once between checkpoints.
I practised putting those damn Yaktrax things on until it wasn’t an absolute bloody nightmare. This is possibly only necessary if you are wearing Hokas.
I sewed everything on my kit to ensure it didn’t come loose on the trail. I also had a tiny sewing kit in my drop bag. Thankfully not needed. I also carried 4 big safety pins on my pack, ready for re-attaching something in an emergency. I swear by safety pins as the ultimate ‘just in case’ accessory for an ultra.
I also had a tiny laminated spreadsheet of distances between checkpoints, cut-off times and other useful stuff.
I used a Suunto 9 watch to track my progress, lovely thing.
And my drop bag….
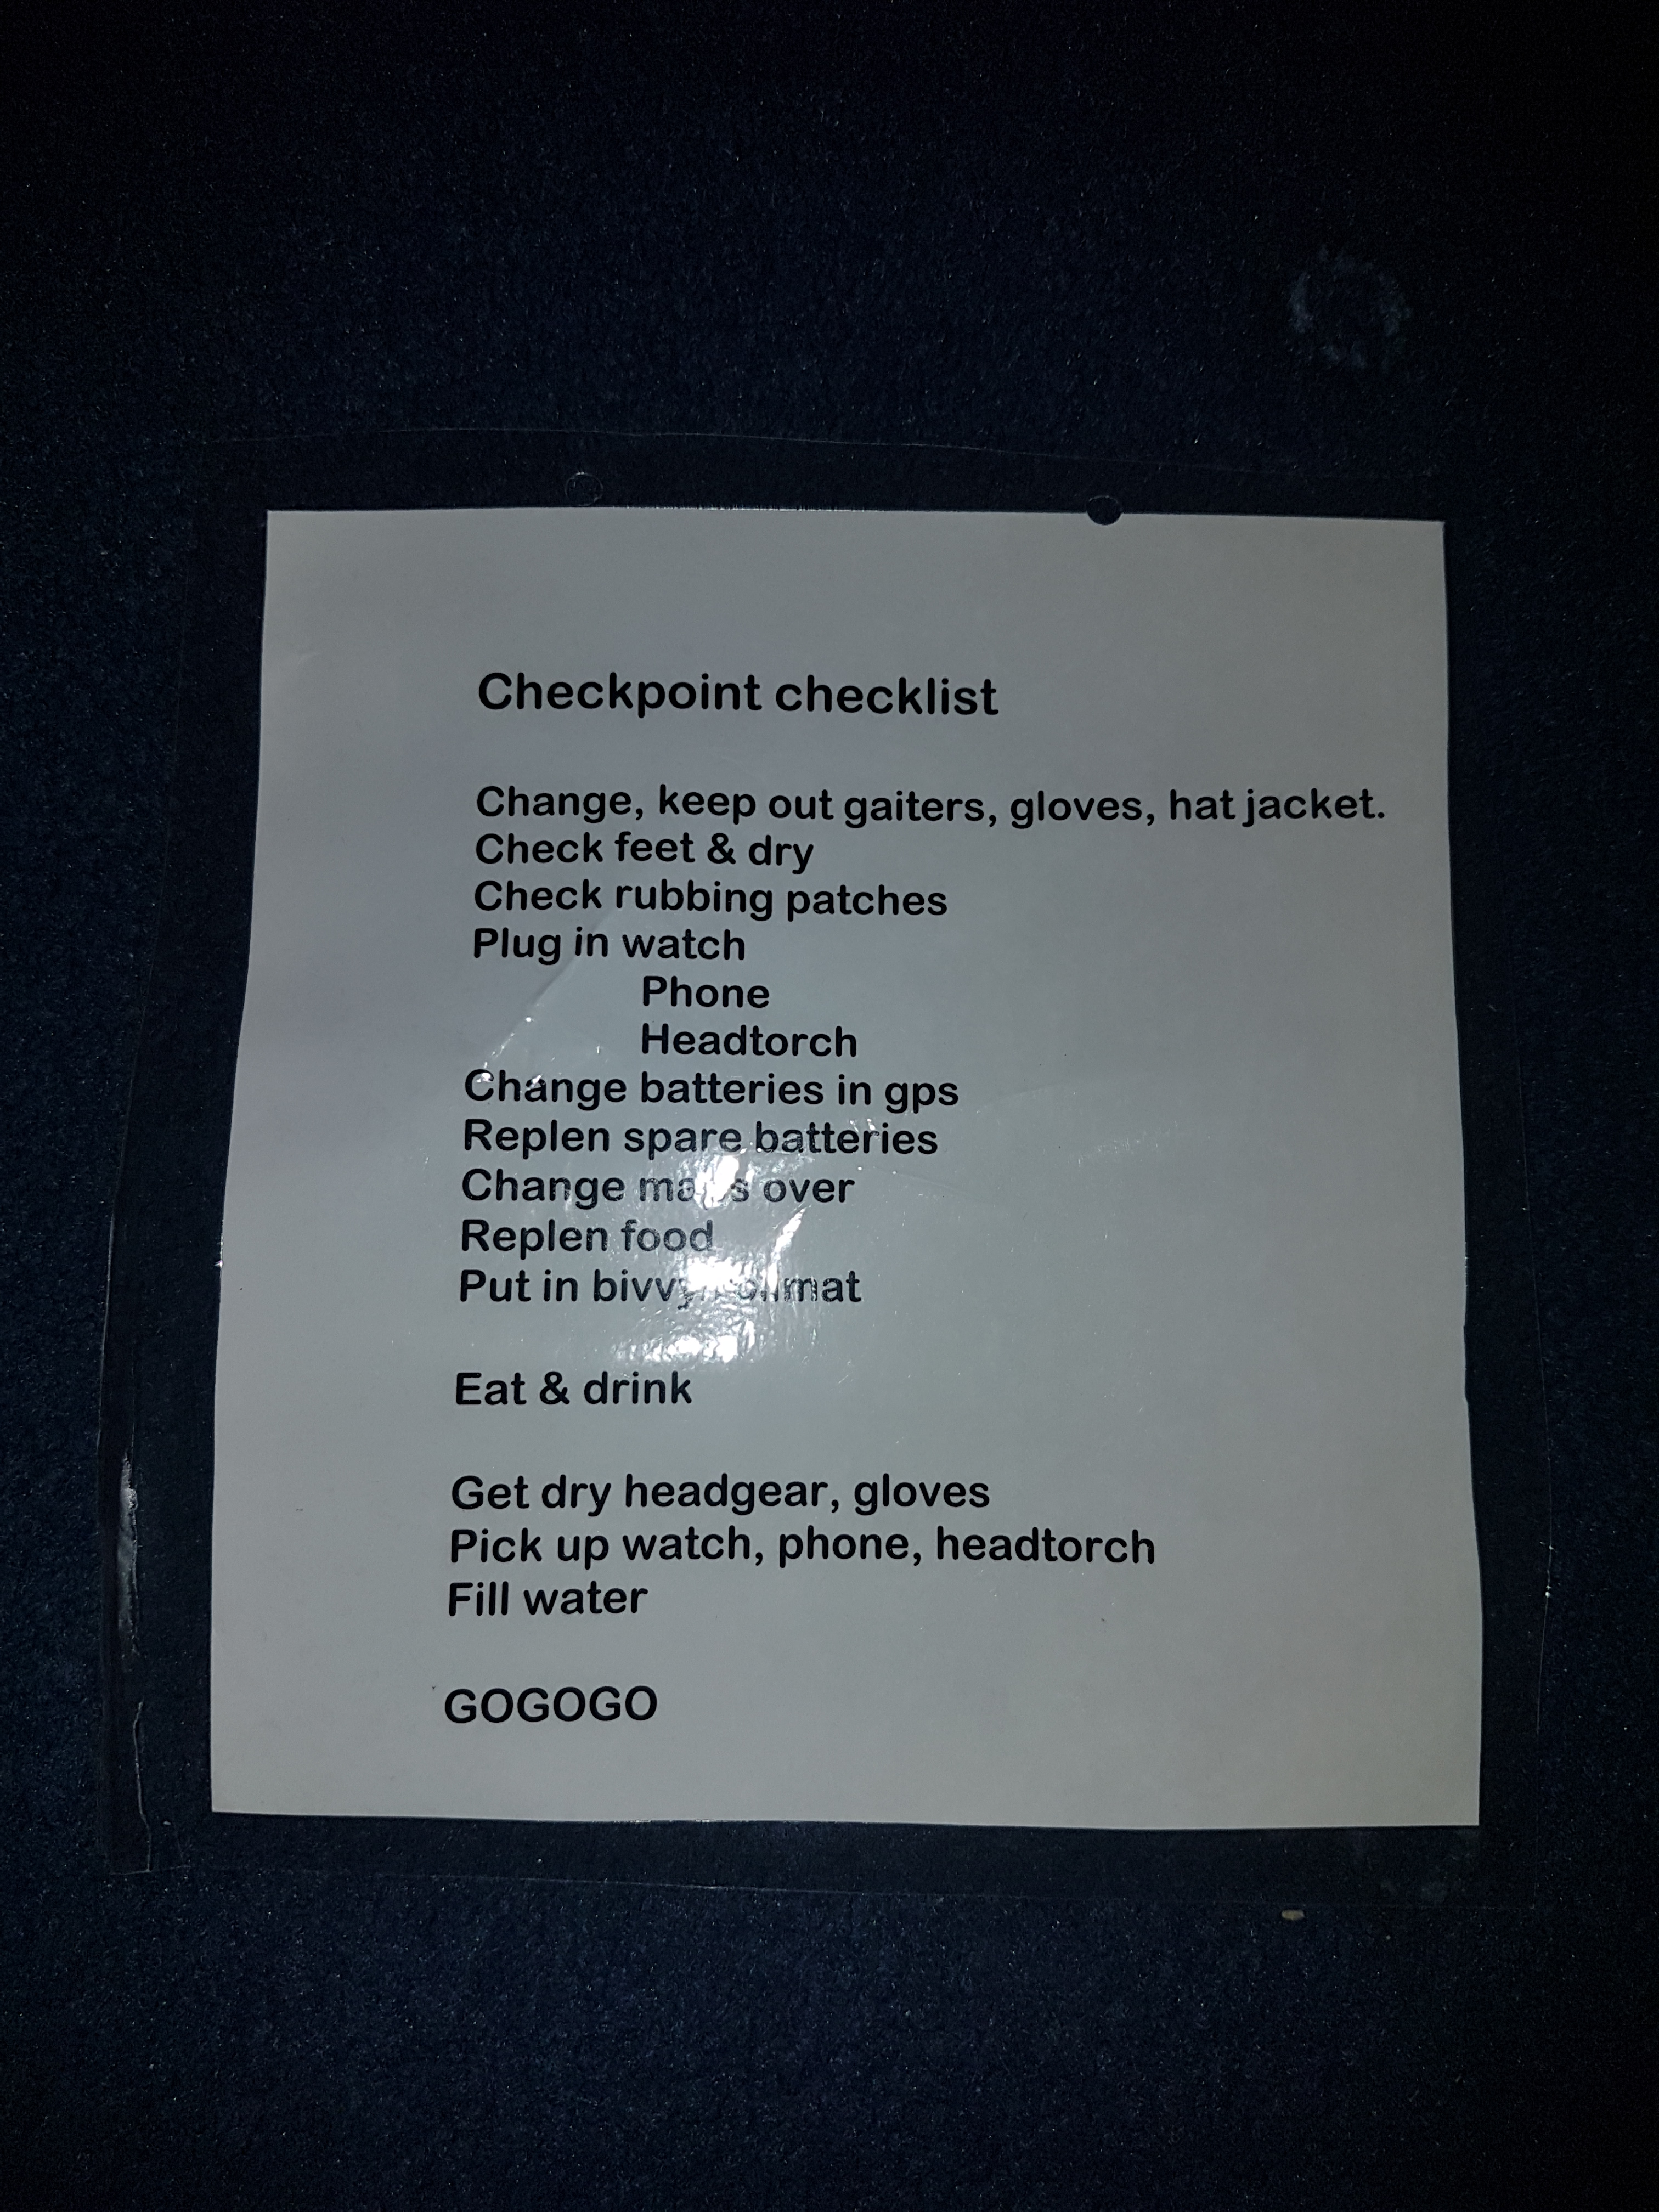
Two compartments at either end. One was filled with the immediate stuff I’d need to swap my muddy shoes out at every checkpoint – plastic gloves (for keeping hands clean when getting boots off), wet wipes to clean feet, comfy slide-on shoes…I wanted my soggy feet to dry out as much as possible, so they needed to spend some time in the air, without socks on.
In the other compartment was all the ‘important’ stuff for the checkpoint that wasn’t clothing…about 3 charging blocks & leads (for charging head torch rechargeable battery, watch, phone), spare batteries (for GPS), replacement hand warmers etc.
In the mid section of the drop bag was everything else!
Everything was in clear plastic food bags with press-seal tops. Easy to know what was in every bag and could be compacted down, air squeezed out and then sealed to take up minimal space.
Two pairs of shoes, both bigger sizes than the pair I’d be starting in. I.e. I started in a size 12 (I normally take an 11) and my Hoka Speedgoats were a 13, and my ‘last-resort’ shoes in case of foot-swelling disasters were Innov8 Rocfly 390 size 14’s. Both pairs in plastic bags to keep everything clean.
Spare trousers, leggings, merino wool leggings, & spare waterproof trousers (cheap ones). Spare warm hat. Spare waterproof gloves (as well as the multiple pairs I was carrying).
4 standard running long sleeve tops, 2 heavy running tops. 2 merino wool base layers. 1 spare string vest. 4 spare buffs, and one spare merino wool one that I didn’t need.
Spare torch batteries, spare charging block, spare windproof matches, spare red rear light, spare headphones.
Water filter, just in case the last section over the Cheviots looked like not having any water available, which is what I found on my recce. In reality the mountain rescue super-stars were manning Hut 1 & 2 so that was not a problem.
Batteries. Lots of batteries. Mainly for my GPS, but my spare head torch also used AA so they were for that also. To simplify things I planned to replace the GPS batteries at every checkpoint, so that meant having that many, plus a few extras for emergencies. Lithium seems to be the battery of choice for cold weather. Naturally, they are the most expensive too.
Food:
- 5 dried meals, to replace the 2 I was carrying if necessary. All had between 600-1000 kcal.
- 10 cup-a-soups (I use these when my stomach refuses to eat, which is pretty much every time)
- 2 bags of boiled sweets…sherbet lemons & butter mintoes if you are interested. I tried to only carry 5 sweets with me at a time though. A boiled sweet can give your blood sugar just the kick it needs it you are feeling low.
- A bar of Cadburys chocolate, yum.
- A few tins of mackerel in sauce. I carried one with me too, useful it you want protein rather than savoury. Mackerel has saved me a few times on ultras (especially Thames Ring 250 on the final night) but it does make me smell a bit fishy.
I had everything in a huge 100 litre bag, that had wheels and a handle built in for easy movement. It was water-resistant, very important! And yes, I did manage to get down to the 20kg weight limit.
Is that everything? Yes, I think so. I spent a great deal of time (and money) getting my kit together (over a number of years & ultras), and I have no hesitation in recommending it all, and the spares I took but didn’t use. Frankly, the Spine is difficult enough without making it harder by trying to do it in a pair of wellies and a flimsy cagoule. I know myself well enough that if I DNF a race I have to go back and finish it another time, so it was simply self-preservation for me to prepare well for my one and only attempt at the full Spine.
Was it worth it? After a few months of reflection and with the distance that only time gives, I think I’ll remember the Spine for the rest of my life, but not just the race itself. Rather, the journey I took to get to the finish line: numerous difficult ultras that built my experience, a selection of kit that I built over the years that I knew would not let me down, and building a mindset that knew how to suffer and keep suffering. The final 6 months of training were really tough, but exactly what I needed to feel I had invested too much time and energy to DNF this particular race.
Having finished and ‘retired’ from ultras, I now find I have quite a nostalgic view on my past efforts. It’s like I’m an old man that views his younger days with a rose-tinted view, forgetting the pain and the effort it took.
I remember it as being easy and fun, when I know it wasn’t. Funny that. Maybe I need to go back and remind myself.
….and that’s the end. Good luck if you’re doing the spine (whether the full, challenger or sprint) and have a great time. Please leave a comment if you’ve found this useful!